Thursday, July 28, 2011

Oh Happy Day!

Isn't it a happy day when the weather is fine and you are feeling great? Well, that has been my day today!

I just finished a card using the Crafty Secrets Creating with Vintage Patterns CD and Mini-Vintage Creative Scraps. I designed the card base using the patterned papers on the CD and elements in Sketchbook Pro. I created my design in a 10 inch by 7 inch format for my 5 inch by 7 inch card. I designed the front and back at the same time! So simple. I printed the base card out on a white 5 x 7 card blank and added buttons, stitching, the mini vintage scrap mounted on card stock and a little bit of stickles on the Robin's blue eggs.


Could not be easier! Hope you all have a happy day! If you have any questions about the CD or the techniques I am using just ask. I am always happy to provide you with a tutorial!

Friday, July 22, 2011

WINNERS! Crafty Secrets Give Away!

We have two winners tonight! Yeah!

First for the Mini Scraps and little goodies from me:

Becky Dunham said...
What a fun project! I have seen this kind of thing before but this one is beautiful! Love all the little images - thanks for the chance to win some for myself :)

rebeccadunham at hotmail dot com

And the winner for the Creating with Vintage Patterns CD:

Sylvia/LittleTreasures said...
What a fun post. Baseball and kids is really all summer is about
I've seen so many wonderful things made off this CD I just think it is almost a must have. The inspiration is awesome.
Thanks for the fun

If you both will send me your addresses at drvamears at yahoo dot com, I will get your prizes out in the mail shortly! Thanks for visiting and playing along.

Wednesday, July 20, 2011

Baseball And Crafty Secrets Have Been Good to Me & You!


Happy Wednesday, everyone! I am in Sacramento California this week at the Thunder Valley Resort for work. While I am away, I wanted to show you a layout made with the new Crafty Secrets Creating with Vintage Patterns CD and the new Play Ball Stamps (SL 44).

This is my son playing for Mt. Tabor Little League 9-10 year old All Stars. They played with heart in the Clackamas tournament. Even though they were eliminated after two games they battled the whole way. I am one proud mom!

To make this layout, I first made the heart embellishment. I inked a chipboard heart with Versa Magic Aspen Mist Ink, which I let dry throughly. I stamped the heart with the baseball stamp inked with Tim Holtz Distress Ink by Ranger in Fired Brick. I stamped the All Star Base and the Mitt on White Card Stock with Color Box Royal Blue Ink and Fired Brick Ink, respectively which I embossed using clear embossing powder. I cut these out and layered on the heart and set aside.

One of the amazing advantages of the Creating with Vintage Patterns CD is you never run out of paper. I printed one of the papers in 8 x 8 on white card stock. I added the photo. Then I stamped the three stars from the Play Ball set with acrylic paint and Fired Brink ink over the acrylic paint when it was dried.

Finally I added the embellishment and the journaling spot, which was also inked with the Aspen Mist Color.

On Friday, I will announce the winners of both today's post and Monday's post. Today, I am giving you a chance to win the Crafty Secrets Creating with Vintage Patterns CD. What do you have to do to win????? Just leave your name and a comment about why you would love to win. I will randomly select the winner on Friday July 22nd, when I get back from my business trip! Good Luck!

Monday, July 18, 2011

NEW Product Show Offs! Crafty Secrets

Today I get to show off some new Crafty Secrets Product that are ready now! I used Mini Vintage Creative Scraps for the design team challenge, I made a pretty cookie plate that is hand washable.


This project uses the Mini Vintage Creative Scraps. Let's make one together!

Supply list:

1 Sheet Mini Vintage Creative Scraps
1 Paper doily
1 Clear plate (I got mine for a dollar at the Dollar Store)
Paper Towels
Mod Podge (I used Matte finish)
Tissue paper
Acrylic spray

Tools:
Scissors, craft knife, rag, bowl of water, brush, damp sponge

Directions:


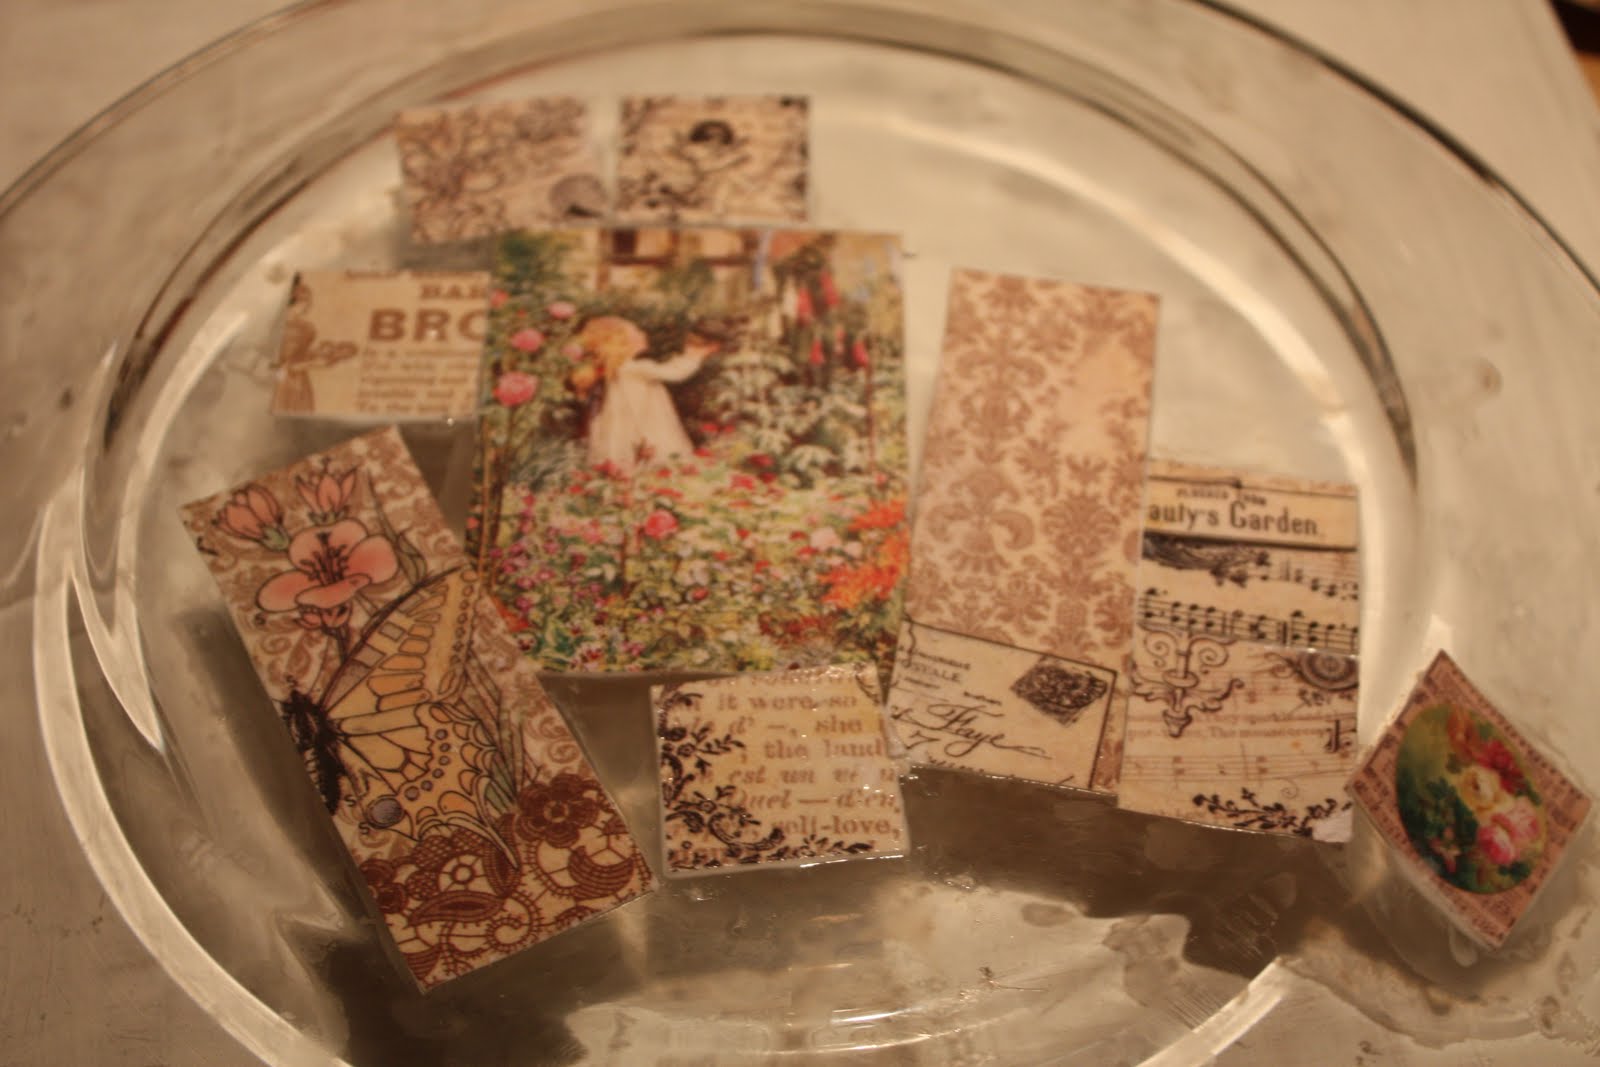
1. Cut out your Mini Vintage Creative Scraps, you can use the fronts which are brightly colored or the more softly colored cream and brown backs OR mix it up!

2. Plan you design. Adjust until it is how you like it.

3. Set up! Being organized will help this project along a lot. Make sure the water is not in your elbow space and place the paper towels on the side and have a damp rag ready handy to wipe your hands on.


4. Pick up a scrap an add it to the water. It will curl up a little and then flatten out. This makes it so that you won't have wrinkles in your work.


5. Gently taking the scrap out of water and place it on a paper towel. Brush the Front of the image with Mod Podge and place carefully on the Back of the plate.


Hint: If you have bubbles, gently dab the back of the scrap with a wet sponge or rag, until no wrinkles show.

6. Repeat with the remaining clippings, check the front of the plate from time to time to make sure everything is where you want it to be and has no bubbles.


7. When you are finished gluing on images and doilies, brush an even coat of Mod Podge over the back and let the plate dry face down overnight - no peeking!


8. Place the plate upside down on tissue, trim close to the edge of the plate. It doesn't need to be exact at this point.

9. Brush Mod Podge on the back of plate and smooth tissue, set the plate face down again to dry overnight.


10. When it's completely dry, trim the excess backing from the rim with a craft knife.

11. Apply three coats of Mod Podge, allowing to dry between coats. When completely dry spray with an Acrylic Clear Spray.


Remember it is only HAND Washable.


Now, head over to the other design team members blogs and check out their great projects!

Crafty Secrets Design Team

Vicki Chrisman Team Leader
Pam Hooten
Heidi Blankenship
Linda Duke
Michele Kovack
Amy Teets
Debbie Marcinkiewicz
Fauve van Maanen
Julie Campbell
Gini Cagle
Jan Hennings
Tammy Roberts
Victoria Warren Mears (You are here!)
Viola Mahr

But wait, leave a comment here and I will draw a winner for a Mini Vintage Creative Scrap sheet so you can make your own plate! Winner will be drawn on Friday. Check back on Wednesday for some more projects with new product and another give away!

Friday, July 15, 2011

Life at the Zoo


Mr. P has been at zoo camp at the Oregon Zoo this week. He is totally loving it! He had a camera with him and took these shots (among 100 or so others). He is getting to be a great photographer.

For this LO I used the Crafty Secret Digital Paper CD, Creating with Vintage Papers. I love the background paper and it seemed a little "zoo like" to me. I used the letters filled with a green hounds tooth pattern, and buttons. The collage template was designed by Amy Teets, another design team member. I love how easy this layout was to do!

Happy weekend everyone!

Thursday, July 14, 2011

Whitney Family Exploration

I have been working a bit more on my heritage albums. Here are two new layouts of old photos. This first layout is of me. I found a photo with great contrast and made a "paper doll" of me. The super cute background paper is from Crafty Secrets digital CD. It was crying out for a little girl! I love the colors and the look of this paper. The layering is also done with papers cut from the papers on the CD.


I just got the photo in the following layout from my cousin Marcia. This was her dad, my great-uncle in a photograph from the 1940s. I remember him as a tall slender man and this photo certainly accentuates that. What a winning smile! The papers and embellishments on this layout and the layout of me are all from Crafty Secrets' new digital CD Creating with Vintage Patterns.


Thank you for stopping by!

Friday, July 1, 2011

Retro Summer Fun - Crafty Secrets and Scrappy Chic Cafe


Happy 4th of July weekend! (and Canada day to my Canadian friends!) Today I wanted to show you this month's sketch at Scrappy Chic Cafe. The challenges are found under the group tab and choosing the July Challenge Group. Each month I provide a sketch with a RAK to the winner. The summer is a great time to enter because more people are enjoying the outdoors than are inside scrapping, so join the challenges at the Cafe! This month's sketch is inspired by the stars and stripes, but would be easily changed by swapping out the stars for flowers!

For my sample layout, I went digital using some more of the "vintage" me photos. All of the papers and embellishments I used are from the Crafty Secret CD, "Creating with Vintage Papers". I love everything about this CD. The designs are totally fun to play with. I plan to show you a lot more in the coming weeks.

To make the LO:
1. Select your background color and duplicate the layer to a new 12 x 12 inch file set at 300 dpi.
2. Open a coordinating color and use your cookie cutter tool to cut an 11 inch diameter circle. Duplicate this layer and send to your 12 x 12 file.
3. Open a third and use your cookie cutter tool to cut a star. Send to the 12 x 12 file and duplicate 4 times, space the stars around the circle layer.
4. Add your title, I used Arial lettering at 72 pixels with a drop shadow.
5. Select your photos and crop to 3 x 3 inch. Using a grid align them to the layout.
6. Select a fourth color of pp and using your cookie cutter cut small scallop edged flowers, send to 12 x 12 file and layer on stars. Add drop shadow layer to each.
7. Choose the button embellishment and add to the center of each star.
8. Add the journaling embellishment and your journaling.
9. Finally add drop shadows to each layer and adjust to your liking, so they look dimensional.
10. Save as a jpeg and size according to your liking.

Have a wonderful weekend! Be safe!
<3 Victoria